Adobe Lightroom Plug-in for Z1 - free
For THETA Z1
How To: Edit and Stitch RAW DNG Images From RICOH THETA Z1 with Adobe Lightroom Classic CC and THETA Stitcher
This article contains
- Links to example images processed from RAW DNG images from the Z1
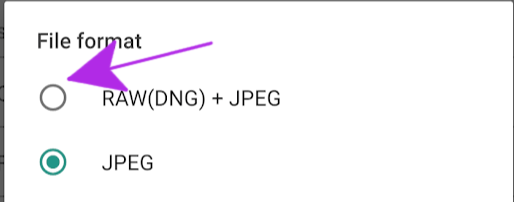
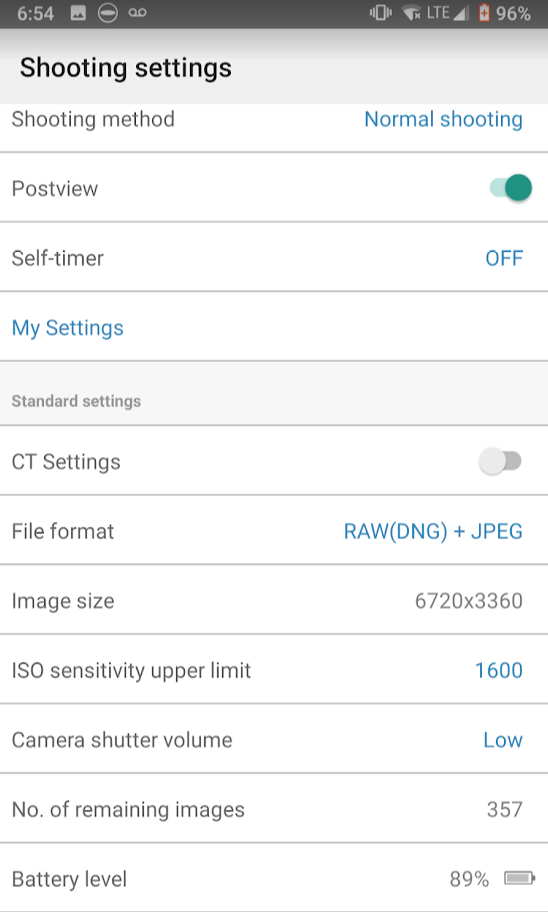
- How to set Z1 to take RAW (DNG) images
- Configuration of Lightroom Classic CC Plug-in
The RICOH THETA Z1 is a major improvement over the THETA V, offering superior image quality and features such as RAW that are valuable for many industries, including real estate, tourism, training, construction, used car sales, and visual special effects (VFX).
Higher resolution and more color and light information in each picture mean greater detail on the zoom and better shots in low light or shots with bright and dark sections. The Z1 takes images at 6720x3360, a major improvement over the 5376x2688 of the V.
You can see great use of THETA Z1 DNG images by Sam Rohn in this article.
RICOH developed a plug-in for Adobe Lightroom Classic CC that makes it easy to stitch the RAW DNG images in a smooth workflow with Adobe Lightroom Classic CC.
I tested the RICOH THETA Z1 in early morning low light conditions. Even with my below-average photography skills, I found that Z1 handles the light/dark balance better than the V. I also compared the resolution and found that in pictures of my garden, the Z1 offers much better details of the leaves. For a better example of images, see the article on Sam’s images.
How to Set the Z1 to Take RAW (DNG) Images
Setting the Z1 to take RAW images is easy with the mobile app.
Lightroom Classic CC Plug-in to Stitch DNG Images with Conversion to TIFF or JPEG
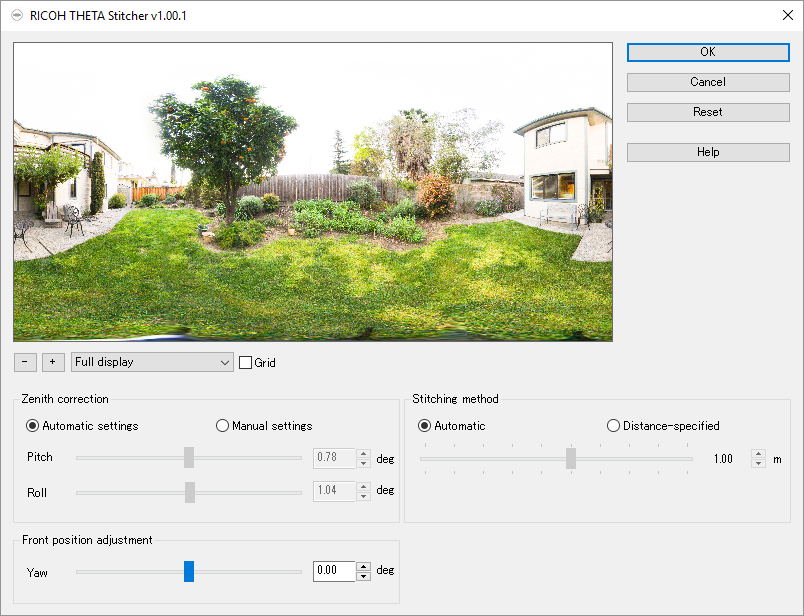
RICOH created a Lightroom Classic CC Plug-in to easily stitch the dual-fisheye RAW images into equirectangular.

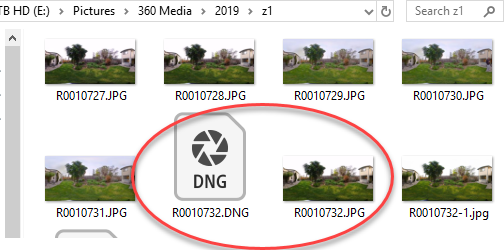
The DNG file is created alongside a standard JPG file.
Configure the Lightroom Plug-in To Use the THETA Stitcher
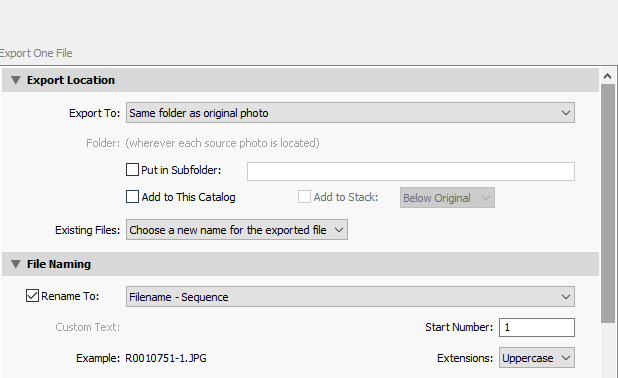
Please pay attention to the following screenshots for usage of the plug-in. Note that you must keep the filename of the stitched file the same as the DNG file.
Windows
Mac - Click On Image for Larger View
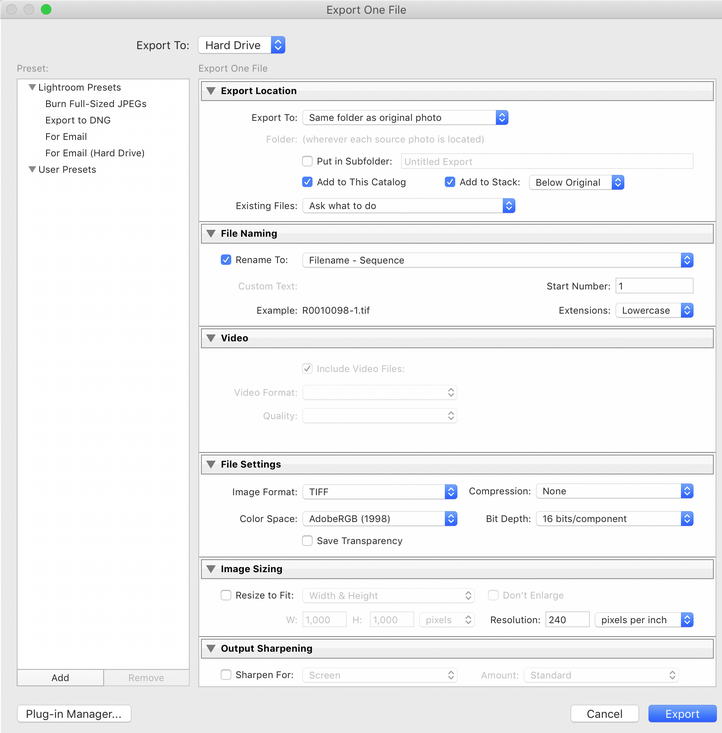
Select the Application “RICOH THETA Stitcher.exe” on your local computer, then save as a Preset.
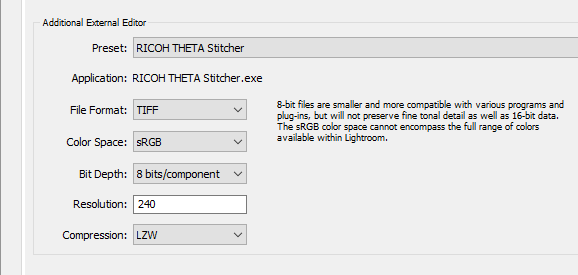
On my computer, this is the location of the RICOH THETA Stitcher.

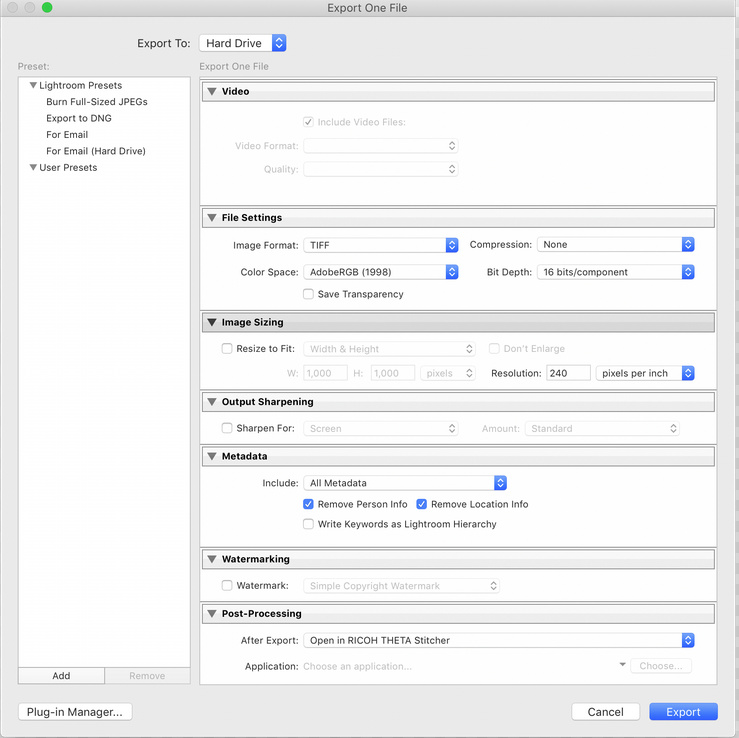
Mac Screenshot - Click on Image for larger image
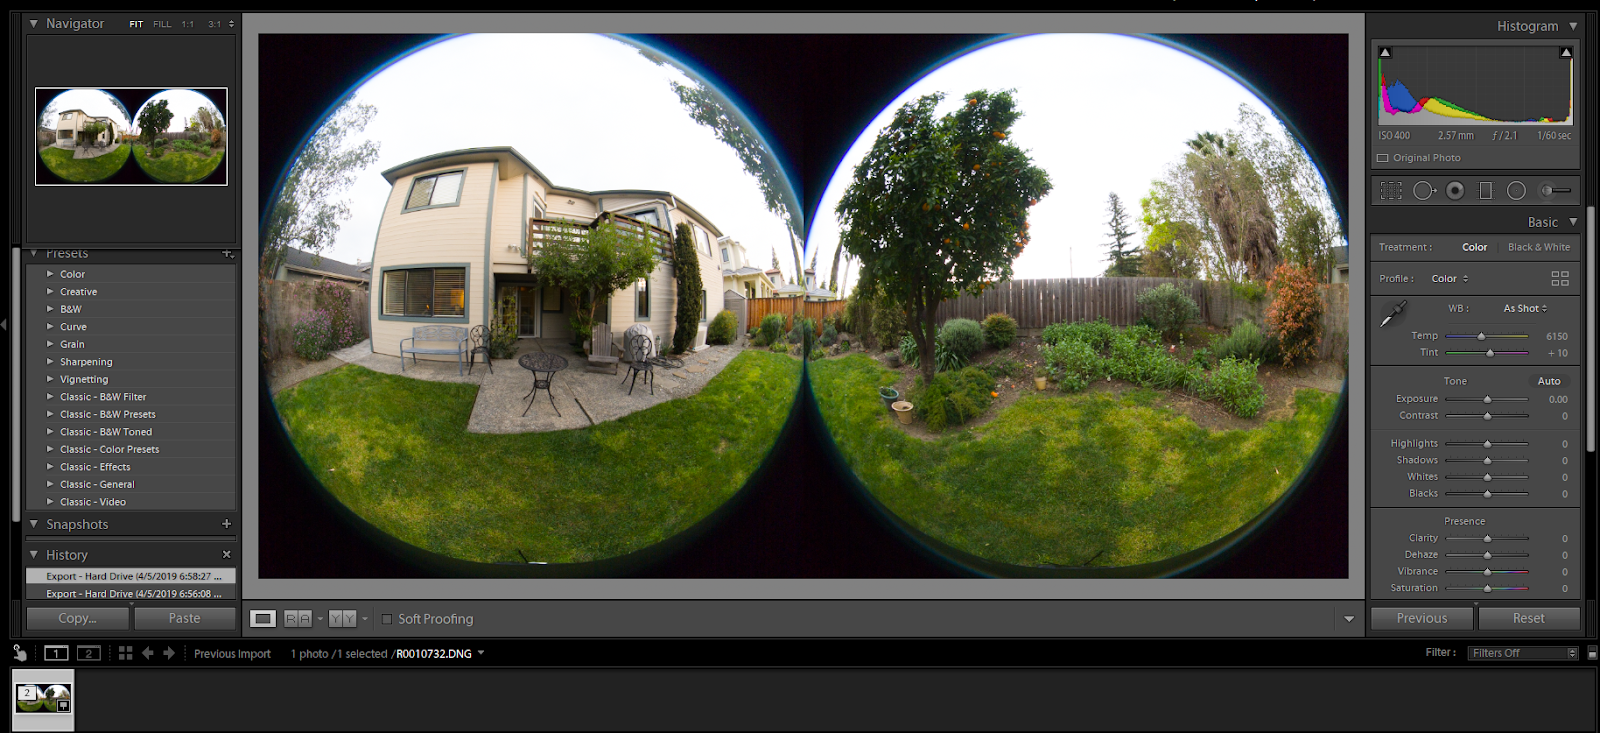
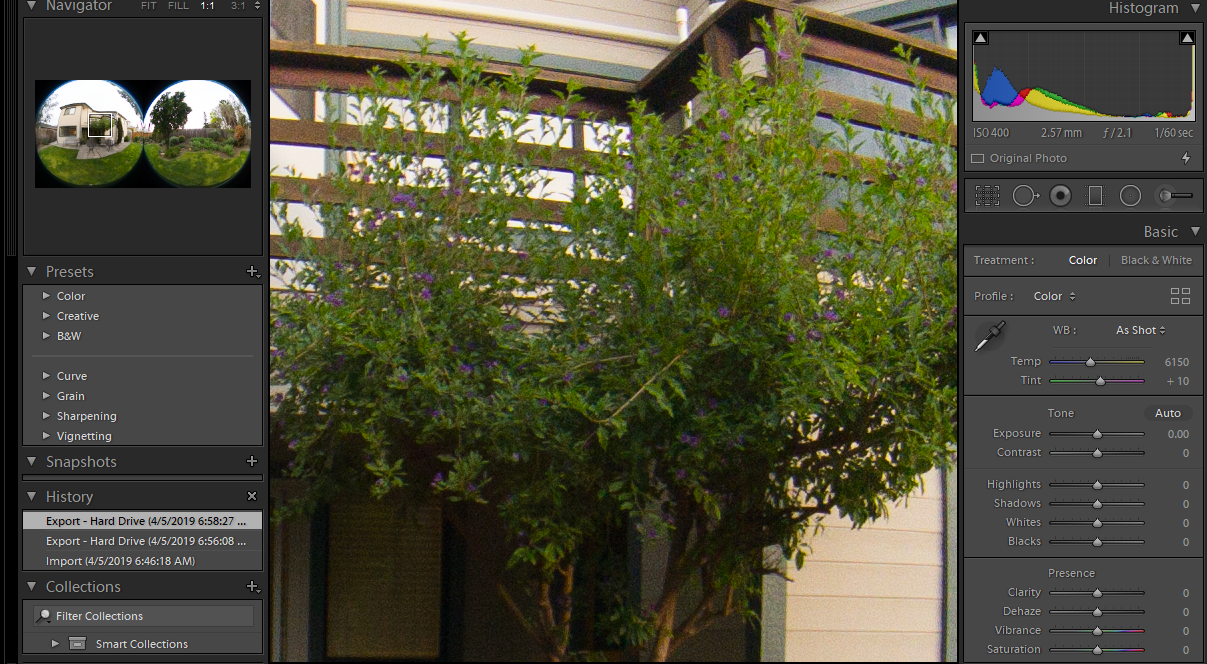
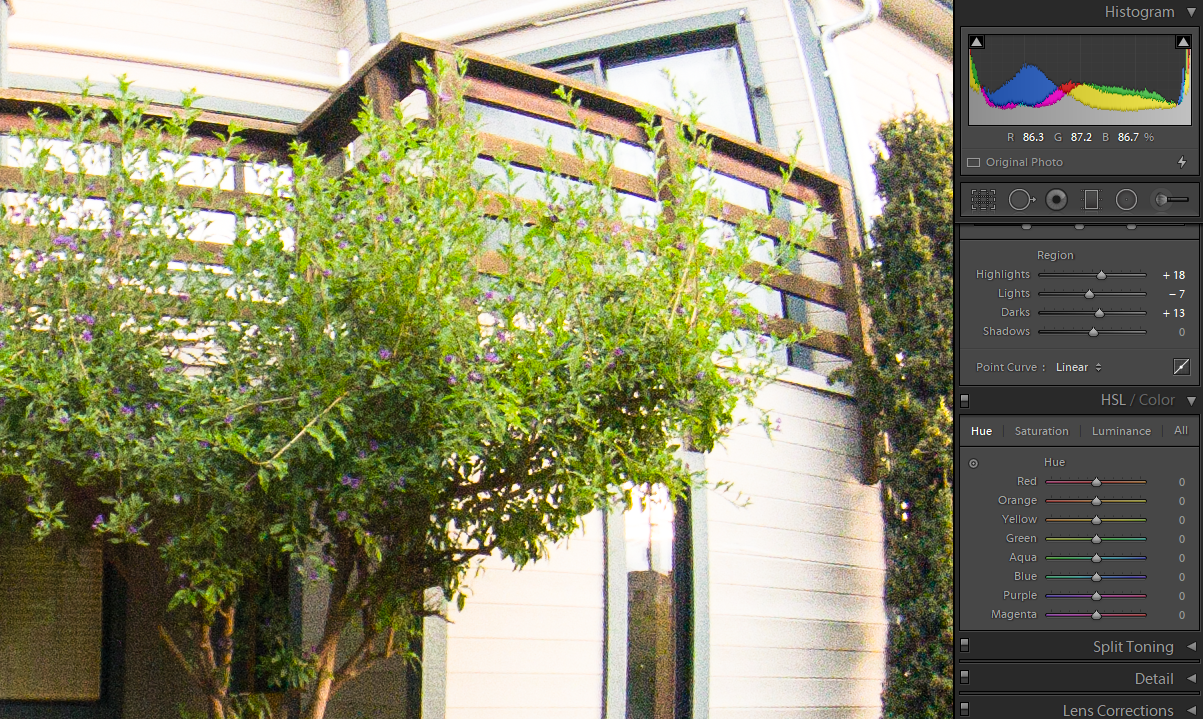
Editing DNG Images in Lightroom
You have a wide range of editing tools.
Within Lightroom Classic CC, the stitching app can automatically be called up at time of export.
Set up Post-Processing -> After Export: and select “Open in RICOH THETA Stitcher.exe”

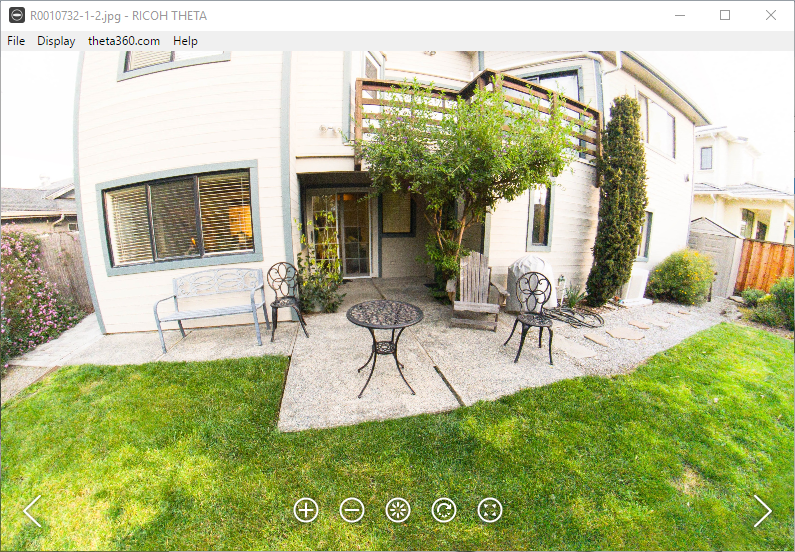
After you press “OK”, an image is saved to disk that can be used in 360 viewers.
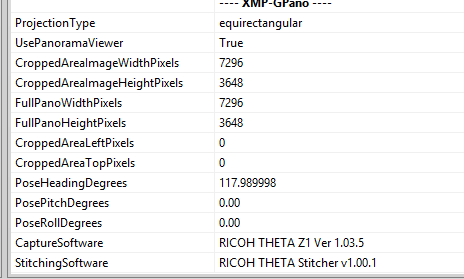
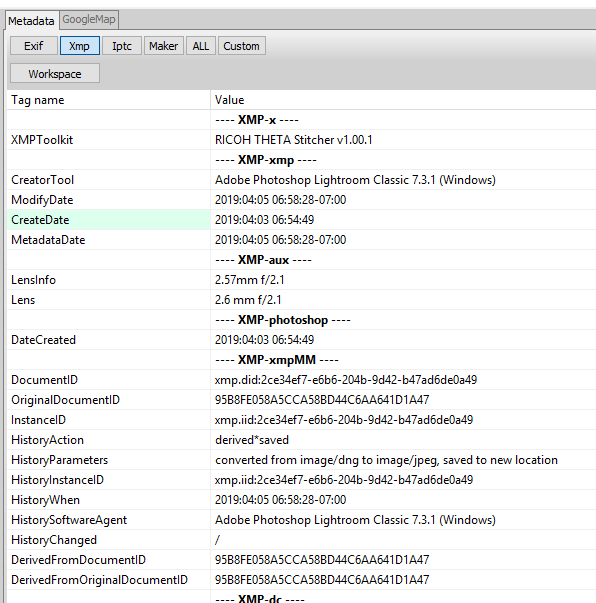
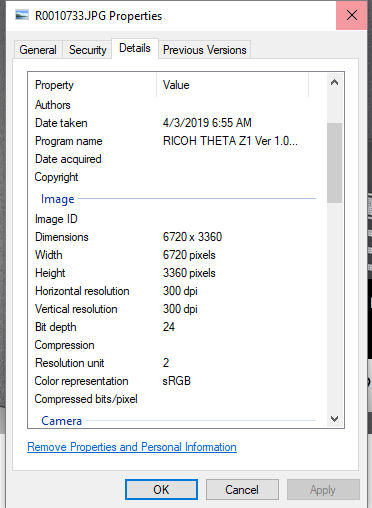
Reference Information on Metadata and File Size
The metadata of the exported image is preserved. The test below was done with exiftoolgui.
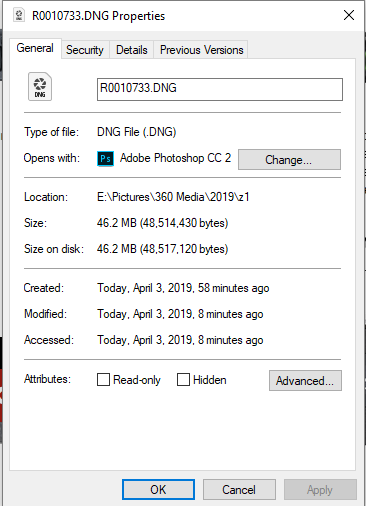
As the RAW image format has so much flexibility, I spent additional time comparing the RAW DNG file to the JPEG file. The DNG file is 46MB in size.
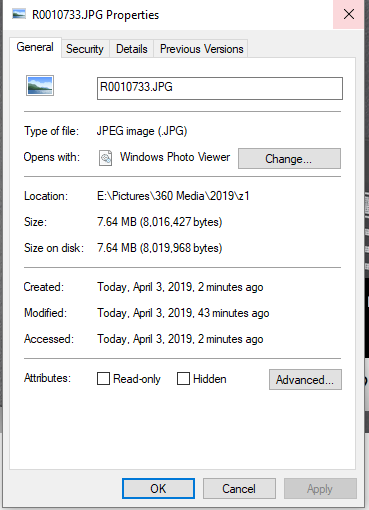
JPEG images are 7.6MB
Summary
This is a first quick look at the THETA Z1 images. Due to the improvements in image resolution, light, and color data, the Z1 images offer much great flexibility for color and light editing compared to the images from the THETA V. The stitching app for Adobe Lightroom Classic CC is a great addition that allows the DNG images to be used easily. The increased resolution will also help computer vision and object recognition projects.